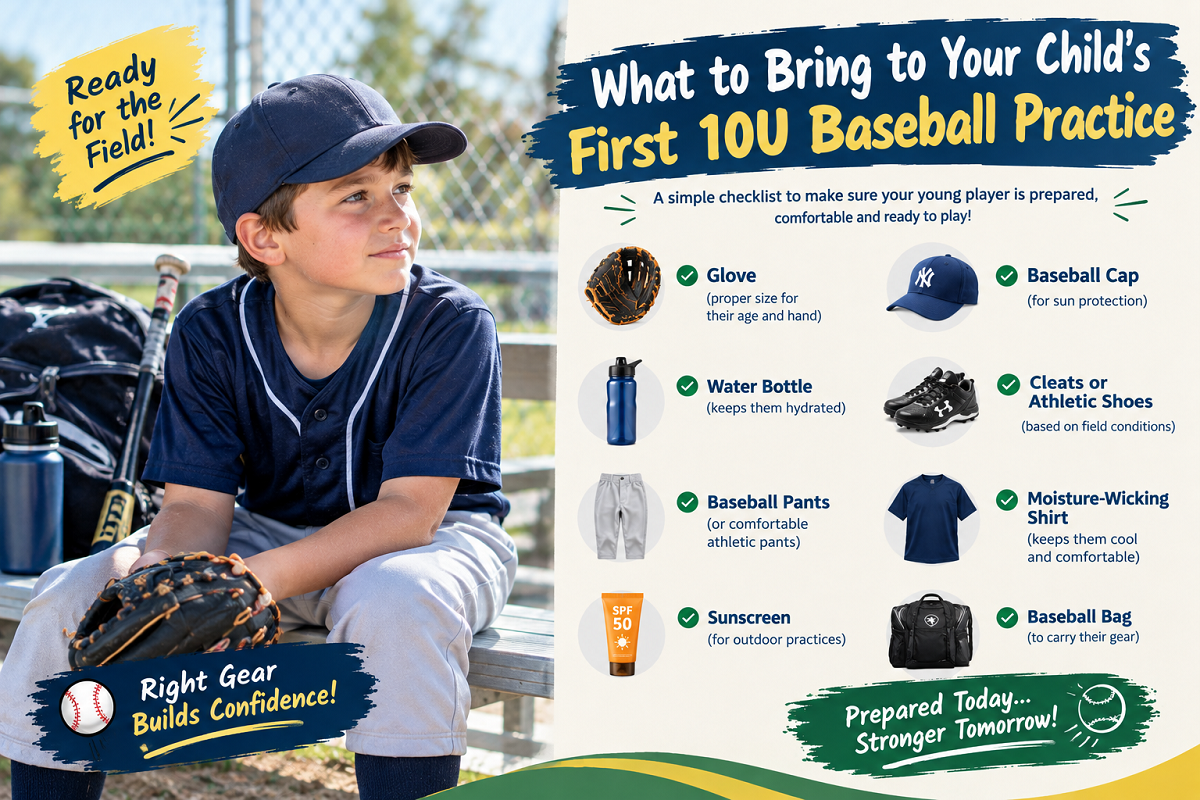
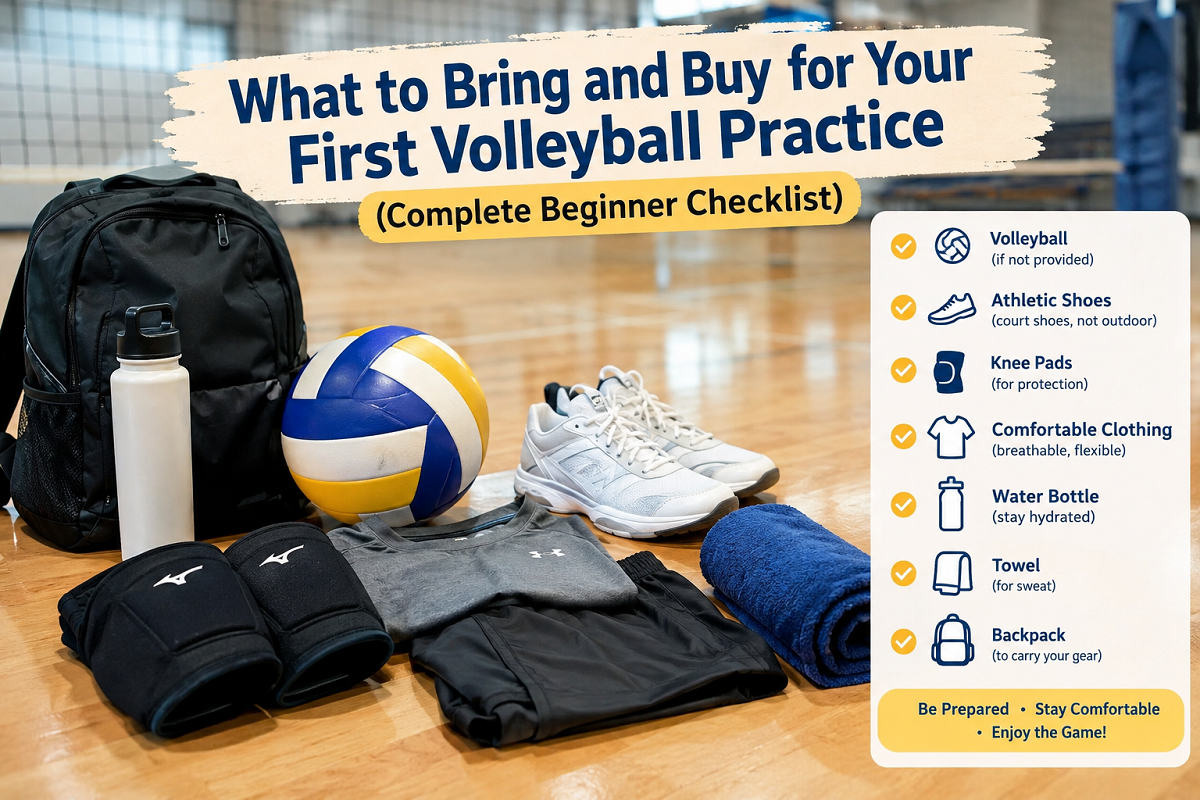
For a first volleyball practice, bring clean non-marking indoor shoes, flexible athletic clothes, a full water bottle, hair ties, a snack and any forms the organizer asked for. Knee pads are the only purchase worth making in advance. Everything else (court shoes, braces, your own ball) can wait until you know you will keep playing.
That answer fits on one line, but it hides the details that actually decide whether your first session is comfortable: which floor you will be on, why your running shoes may feel unstable, how a knee pad should sit, what the coach is shouting, and what the unwritten rules are. This guide covers those details, with specific tests you can do at home and practical fixes for the problems beginners run into.
Use this as your screenshot checklist. Every row is explained later.
| Priority | Item | Why it matters |
| Must bring | Clean indoor shoes with non-marking soles | Grip and floor rules; the most common reason beginners get turned away or slip |
| Must bring | Flexible shorts or leggings, breathable top | You will squat, lunge and reach overhead for 90+ minutes |
| Must bring | 750 ml to 1 litre of water | Gym fountains are slow and shared |
| Must bring | Two hair ties (even for short hair, bring one) | Hair in your eyes means lost sight of the ball |
| Must bring | Snack and small towel | Energy dips around the 60-minute mark; sweat reaches your eyes and hands |
| Must bring | Forms, ID, cash or payment method | Many organizers will not let you play without a waiver |
| Buy if you can | Volleyball knee pads | Protects skin and bruising from floor contact; best value item |
| Wait | Volleyball shoes, ankle brace, personal ball, bag | Buy after practice two or three, when you know your foot, your gym and your commitment |
The three things that most affect comfort are grip underfoot, padding at the knee, and being able to see the ball. Spend your attention in that order.
The right packing list depends on where and with whom you are playing. Spend five minutes working out which situation you are in.
The surface under you affects shoes, knee pads and even how you warm up.
You can ask the organizer what the floor is, or look at photos on the venue's website or social page.
| Session type | What to expect | Gear risk |
| Beginner clinic or intro class | Basic skills, lots of repetition, balls and nets provided | Low. Clean sports shoes and comfortable clothes are accepted |
| Recreational or social league | Relaxed games, mixed levels | Low. Some venues enforce non-marking soles |
| Open gym or drop-in | Self-organised, shared balls, variable skill | Medium. You may have to arrive with your own water and warm yourself up |
| School or college team | Uniform or practice kit may be required, coach sets standards | Medium. Ask before buying anything |
| Club tryout | Coaches watch footwork, ball control, attitude | Medium to high. Arrive prepared, clean shoes, knee pads recommended |
| Beach or sand | Barefoot, sun exposure, different movement | Different list entirely (see the beach section) |
Before buying anything, send the coach or organizer a short note. Here is a template you can copy:
Hi, I'm new to volleyball and attending my first practice on [date]. Could you confirm: (1) any shoe or clothing requirements, (2) whether knee pads are required or optional, and (3) whether there is a form or fee I should complete beforehand? Thank you!
These three questions cover most of the things that cause awkward surprises at the door. Coaches generally respond well to beginners who ask in advance.
Volleyball clothing does not need to be technical. It needs to survive five specific movements.
Put on the clothes you plan to wear and do the following in front of a mirror:
If anything rides up, rolls down or shifts, change it before practice. Fixing it mid-drill is distracting for you and for your partner.
Your forearms are your contact surface for passing, so your sleeves matter more than in most sports.
A supportive sports bra (medium to high impact) is the sensible choice for jumping and diving. Check that straps do not dig in when your arms go overhead, and that the band doesn't ride up during a dive or reach. Men and others who prefer more support benefit from compression shorts or supportive athletic underwear. All players should check that clothing is not see-through during a deep squat.
Many players want to practice in modest sportswear and wonder what works. In general:
Choose cushioned, snug socks that cover the ankle bone. Moisture-wicking synthetic or wool-blend socks reduce blisters better than thick cotton. Avoid slippery, thin or oversized socks, which let your foot slide inside the shoe. A spare pair for halfway through a long session is a small luxury that makes a surprising difference.
Shoes are the most debated gear question for beginners, and most advice online is either too vague or leans toward expensive purchases. Here is a more useful way to think about it.
| Feature | Volleyball shoes | Running shoes | Basketball shoes |
| Outsole | Gum rubber, flat, non-marking, high grip | Lugged or flexible, built for forward motion | Rubber with pattern for lateral grip, often heavier |
| Weight | Light | Light to medium | Medium to heavy |
| Cushioning | Forefoot cushioning for landings | Heel-focused, thick, built for heel strike | Heel and forefoot, sometimes bulky |
| Heel height | Low, stable | Often raised | Moderate to high |
| Lateral stability | Designed for side-to-side movement | Minimal; sideways movement can feel wobbly | Strong, sometimes stiff and restrictive for volleyball |
The real difference is stability when you move sideways and stop quickly. A thick, soft running heel rolls under you when you shuffle laterally, which is why coaches often steer committed players toward court shoes.
If you do not own volleyball shoes, this ranking of what you probably already have or can borrow may help.
| Rank | Shoe type | Notes |
| 1 | Volleyball shoes | Purpose built, best option |
| 2 | Handball, squash or indoor court shoes | Gum soles and low profile are similar. Often a cheap, excellent alternative |
| 3 | Badminton shoes | Light with strong lateral grip, a good substitute |
| 4 | Cross-training shoes with a flat sole | Acceptable for a trial session |
| 5 | Tennis shoes | Heavier and made for sliding, but stable. Acceptable |
| 6 | Basketball shoes | Stable but heavy. Fine for a first session |
| 7 | Running shoes | Last resort. Raised, soft heels reduce stability |
| Avoid | Trail shoes, deep-lug soles, fashion platform sneakers, sandals | Floor damage, poor grip, high injury risk |
Some widely available lines (such as ASICS, Mizuno, Nike and adidas volleyball ranges) are common starting points, but models change often. Check recent reviews for fit and durability before buying, rather than relying on a brand name alone.
Gum rubber wears down and midsole cushioning compresses. As a rough guide, regular players often replace shoes after a season or two, and sooner when the forefoot feels flat or the tread looks polished. If you play twice a week on a sprung floor, you can expect more life than someone who plays four times a week on concrete.
If you are unsure about the sport, borrow or use a substitute for the first session. If you decide to continue, shoes are the second most important purchase after knee pads. Buying after the first practice also lets you learn your foot width, your gym floor and what your coach recommends.
Knee pads are the one item most beginners should consider buying before practice, but there is a lot of confusion about what they do.
Knee pads protect your skin and cushion the impact of dropping to the floor. They reduce floor burns, bruising and the sting of repeated contact. They do not prevent ligament injuries such as ACL tears, and they do not fix poor landing mechanics. Treat them as skin and comfort protection, not injury insurance.
Anti-slip silicone lining at the top and bottom edges helps pads stay in place and is more useful than extra thickness for beginners.
With the pads on, do 20 squats, 10 lunges and a slow mock dive onto a soft surface. If they slide, bunch behind the knee or pinch, change size or style before practice.
Tell the coach, avoid diving or sprawl drills, and ask whether anyone has spare pads. As a stop-gap, a basic athletic knee sleeve or knee-length leggings provide some skin protection, although they will not cushion impact as well.
Remove pads from your bag after practice. Damp foam smells quickly. Hand wash or use a laundry bag on a gentle cycle, then air dry away from direct heat to avoid breaking down the foam.
Most first-timers need very little protective gear. The key is knowing which problems are likely and which products do something about them.
Ankle sprains are among the most common volleyball injuries, and they typically happen at the net. A player lands after blocking or attacking and comes down on a teammate's or opponent's foot, rolling the ankle. This is not about your shoes failing; it is about where you land.
What this means for you:
Jammed fingers are common for beginners because balls arrive faster than expected. Soft athletic tape (about 1.5 inches / 3.8 cm wide) can support a sore finger. For a mild jam, the usual approach is buddy taping: tape the injured finger loosely to the neighbouring finger. Keep it snug but never tight, and check that the fingertip stays pink. If a finger is swollen, misshapen or hard to bend, stop and have it checked.
Expect red marks on the inner forearms after your first sessions. This happens because passing contact is made with a small flat area on both forearms, repeated dozens of times, often with serves arriving at speed. New players also tend to swing their arms at the ball, which causes contact higher or lower than the flat area, concentrating impact near the wrists or elbows.
Compression sleeves have little evidence of improving performance. Elbow pads, shin guards and heavy braces are rarely needed unless a doctor or coach has recommended them. Do not buy these before your first session.
A small, organised bag means less stress. Here is every item with a reason.
| Item | Why you need it | Notes |
| Indoor shoes in a separate bag | Keeps grit off clothes and the floor | Carry in a plastic or fabric bag; change at the door |
| Spare socks | Dry feet reduce blisters | Pack inside the shoe bag to save space |
| Knee pads | Skin and impact protection | Keep outside the main compartment so they air out |
| Water bottle (750 ml to 1 L) | Hydration | Label it with your name |
| Small towel | Sweat on hands and face affects ball handling | A hand towel works |
| Hair ties and headband | Keeps hair out of your face | Keep one on your wrist and one in the bag |
| Snack | Energy for long sessions | Something you have eaten before |
| Plastic bag for wet kit | Keeps the rest of your bag dry | A large zip bag works |
| Athletic tape and blister plasters | Quick fixes | A small roll and two plasters are enough |
| Spare shirt | Dry top for the ride home | Wet cotton gets cold quickly |
| Personal medication | Asthma inhaler, allergy meds, glucose tabs | Tell the coach where it is |
| Forms, ID, cash | Admin | Photo of waiver on your phone as backup |
| Phone and small charger | Directions and communication | Leave the phone off the court |
Pack in the order you will need things. Shoes and pads on top, since you will change at the door. Put wet kit and damp towels in a separate bag after practice. A ventilated shoe compartment helps avoid smell.
Leave valuables, large amounts of cash, strong fragrances and glass bottles. If there are no lockers, keep your phone and keys with you or in a bag at the sideline, away from the court boundary where balls travel.
No. Balls are almost always provided. An indoor ball is about 65 to 67 cm in circumference and about 260 to 280 g, and beach balls are slightly larger and softer. If you decide to buy one later, match it to the surface you will play on, and avoid very cheap, hard balls that hurt your forearms.
What you eat and drink in the hours before practice affects your energy more than most gear does.
If your session lasts longer than about 60 to 90 minutes, the gym is hot, or you finish with white salt marks on your shirt, an electrolyte drink or tablet can help. For many casual players, plain water and a salty snack are enough. Avoid adding anything you have never tried before on practice day.
| Time before practice | What to eat | Why |
| 3 to 4 hours | Full meal with carbohydrates, some protein, low fat (rice and chicken, pasta, eggs and toast) | Gives time to digest |
| 1 to 2 hours | Lighter carbohydrate-based snack (oatmeal, toast with honey, yogurt and fruit) | Tops up energy without a heavy stomach |
| 30 to 60 minutes | Small, easy snack (banana, dates, a few crackers) | Quick fuel |
| Last 15 minutes | Water only | Avoids stomach discomfort |
Avoid very greasy, spicy or high-fibre meals close to practice, and fizzy drinks. Caffeine affects people differently. If you are not used to it, skip it on your first day.
If practice runs longer than about 75 minutes, a small carbohydrate snack at a break (banana, dates, a few gummies) helps. Afterward, aim to eat within a couple of hours with carbohydrates and a moderate portion of protein, and drink to replace what you lost.
These questions come up often but rarely get answered.
Choose dark-coloured bottoms and bring a spare pad, tampon or cup in a small zipped pouch. Wear shorts or leggings you feel secure in, and pack a spare pair of underwear. Take pain relief only if you normally do so and it is safe for you. You can play and you do not need to announce it; if you need a short break, say so to the coach.
Bring your inhaler, glucose tablets, allergy medication or any other prescribed items, and tell the coach where they are. Wear a medical ID if you use one. If you are recovering from an injury, mention it before drills start.
If you are fasting for religious or health reasons, tell the coach and consider a lighter session or practice after you break the fast. Hydrate and eat carefully after, and avoid pushing hard if you feel dizzy.
Cold gyms need a light jacket for warm-up; hot gyms need extra water, a spare shirt and light, breathable layers.
Do not share shoes. Knee pads should not be shared long-term for hygiene reasons, but borrowing a spare pair for one session is fine if they are clean.
Send a labelled water bottle, a snack, a spare shirt and permission forms. Let the child try the shoes and pads at home first, so fit issues do not surface in front of new teammates. Tell the coach about allergies or medical needs.
Coaches and teammates will use shorthand quickly. Knowing the basics reduces confusion.
| Term | Meaning |
| Pass or bump | Forearm contact used to receive a serve or attack |
| Dig | A defensive pass off a hard-hit ball |
| Set | Overhead pass to put the ball up for an attacker |
| Spike or attack | Hitting the ball hard over the net |
| Block | Jumping at the net to stop an attack |
| Serve | The hit that starts the rally |
| Ace | A serve that scores directly |
| Kill | An attack that scores |
| Pepper | A partner drill of pass, set and hit to practise control |
| Shag | Retrieving balls during drills |
| Rotation | Players move one position clockwise after winning serve back |
| Sideout | Winning the rally when the other team served, which gives you the serve |
| Libero | A defensive specialist in a different-coloured jersey who plays the back row |
| Free ball | An easy ball sent over because the sender cannot attack |
| Cover | Positioning to protect the hitter in case of a block |
| Call: "Mine" or "I got it" | Tells teammates you will play the ball |
Calling for the ball is one of the most useful habits in volleyball. Make it a habit on day one, even when you are unsure.
Most coaches lead a warm-up, but arriving early lets you prepare your ankles, hips and shoulders. This sequence uses dynamic movement rather than long static stretches.
Keep the effort easy. The goal is warm muscles and moving joints, not exhaustion.
Coaches rarely explain these, but experienced players notice them immediately. Following them makes you look like someone who belongs.
If your first practice is on sand, adjust the list.
| Category | Bring | Notes |
| Sun | Sunscreen (sweat-resistant), lip balm with SPF, hat or visor, sports sunglasses with a strap | Reapply every couple of hours |
| Clothing | Quick-dry shorts, swimsuit or fitted top that stays in place | Avoid heavy cotton |
| Feet | Barefoot is standard; thin sand socks or water shoes for hot or rough sand | Bring sandals for the walk |
| Water | More than you think, ideally a litre or more | Sweat and sun increase need |
| Shade | Umbrella or tent if you will wait between games | Sand heats up quickly |
| Towels and bags | Two towels (one for drying, one for sitting), mesh or waterproof bag | Sand sticks to everything |
| Contacts and glasses | Spare lenses or a strap | Sand and wind irritate eyes |
Skip knee pads and court shoes. Sand cushions falls, and pads tend to fill with grit. Before you start, scan the court for glass, shells or sharp debris, and tell the organizer if you find any. Hot sand can burn bare feet at midday, so check temperature before you walk across it.
Prices vary widely by country, brand and availability. The ranges below are approximate and in US dollars. Use them to plan the order of purchases rather than as quotes.
| Item | Approximate range | When to buy |
| Knee pads | $10 to $40 | Before the first practice, if possible |
| Cushioned athletic socks (2 to 3 pairs) | $10 to $25 | Before the first practice |
| Water bottle | $10 to $25 | Before the first practice |
| Athletic tape and blister plasters | $5 to $10 | Anytime |
| Volleyball shoes | $60 to $150 | After practice two or three |
| Ankle brace | $20 to $50 | Only if you have a past sprain or recurring weakness |
| Indoor volleyball | $25 to $70 | When you want to practise outside sessions |
| Gym bag | $20 to $60 | Optional |
A realistic budget for the first practice is $0 to $50. A realistic budget for the first month, if you commit, is about $50 to $150. Secondhand knee pads in good condition are fine, but avoid used shoes with worn soles or flattened cushioning. Ask your club about gear swaps.
| When | What to do |
| Night before | Lay out clothes, pack the bag, fill the bottle, charge your phone, check the address and forms, sleep |
| 3 to 4 hours before | Eat a balanced, familiar meal |
| 2 hours before | Sip water; avoid heavy or greasy food |
| 1 hour before | Light snack if needed; leave home with time to spare |
| 30 minutes before | Arrive, find the court, introduce yourself to the coach and mention any injuries or medical needs |
| 15 minutes before | Change shoes, put on pads, tie hair, wipe soles, start the warm-up |
| During | Drink at breaks, call for the ball, ask for help when unsure |
| After | Cool down, eat within two hours, rinse and air your pads and shoes |
Muscle soreness usually peaks 24 to 72 hours after a new activity. Expect it in your thighs, glutes, shoulders and forearms. Red marks on the forearms are normal. Gentle walking, hydration, a balanced meal and sleep help recovery.
See a medical professional if you notice sharp or worsening joint pain, an ankle that swells quickly or feels unstable, a finger that is deformed or cannot bend, numbness, a hard lump or pain that does not ease with rest.
Ask yourself three questions:
A first volleyball practice does not need a shopping spree. Bring clean indoor shoes, flexible clothing, water, hair ties, a snack and your paperwork. Buy knee pads if you can, ask the organizer about the floor and any rules, and save bigger purchases until you know the sport suits you. Use the warm-up, learn the vocabulary, follow the etiquette, and treat soreness and small problems as information about what to buy or change next.
Yes, for a trial session, though running shoes can feel unstable because of raised, soft heels. Handball, squash, badminton or flat cross-training shoes are better substitutes if you have them.
Not on day one. They become worthwhile once you commit because of the grip and lateral stability they provide.
Yes. They are heavier and sometimes stiff, but they are stable and acceptable for early sessions if the soles are non-marking.
They are usually recommended rather than required. They protect against floor burns and bruising but do not prevent ligament injuries.
Check the size first, then try pads with silicone grip, wear them on bare skin or thin fabric, and make sure the thickest part sits on the kneecap.
Wear flexible athletic shorts or leggings, a breathable top, clean indoor shoes, cushioned socks and knee pads if you have them. Tie your hair back and remove jewellery.
Many wear fitted compression shorts, which reduce chafing and stay in place during dives and squats.
Many players do. Choose a lightweight, fitted sports hijab with a secure underscarf and no pins. Ask the organizer about league rules in advance.
A balanced, low-fat meal 3 to 4 hours before, then a small carbohydrate snack such as a banana or toast 30 to 60 minutes before.
A 750 ml to 1 litre bottle is a good start. A rough guide is about half a litre per hour of play, more in heat.
It is best not to. Rings, bracelets and dangling earrings can injure you or others, and many organizers prohibit them.
It involves repeated jumping and landing, so landing technique and conditioning matter. Knee pads protect the skin, not the joint. Persistent knee pain should be assessed by a professional.
Arrive about 15 minutes early to introduce yourself, change shoes, complete forms and warm up.
No. Balls are nearly always provided. Buy one later if you want to practise outside sessions.
Sunscreen, a hat, sports sunglasses with a strap, extra water, two towels and quick-dry clothing. Most players go barefoot, with sand socks for hot or rough sand.
Most sessions run 60 to 120 minutes, including warm-up. Ask the organizer, and pack water and a snack accordingly.
Dark-coloured bottoms that feel secure, a spare pad, tampon or cup in a small pouch, and spare underwear. You can play normally.
Yes. Soreness in thighs, shoulders and forearms for one to three days is normal. Sharp pain, swelling or numbness should be checked.

This post has been authored and published by one of our premium contributors, who are experts in their fields. They bring high-quality, well-researched content that adds significant value to our platform.